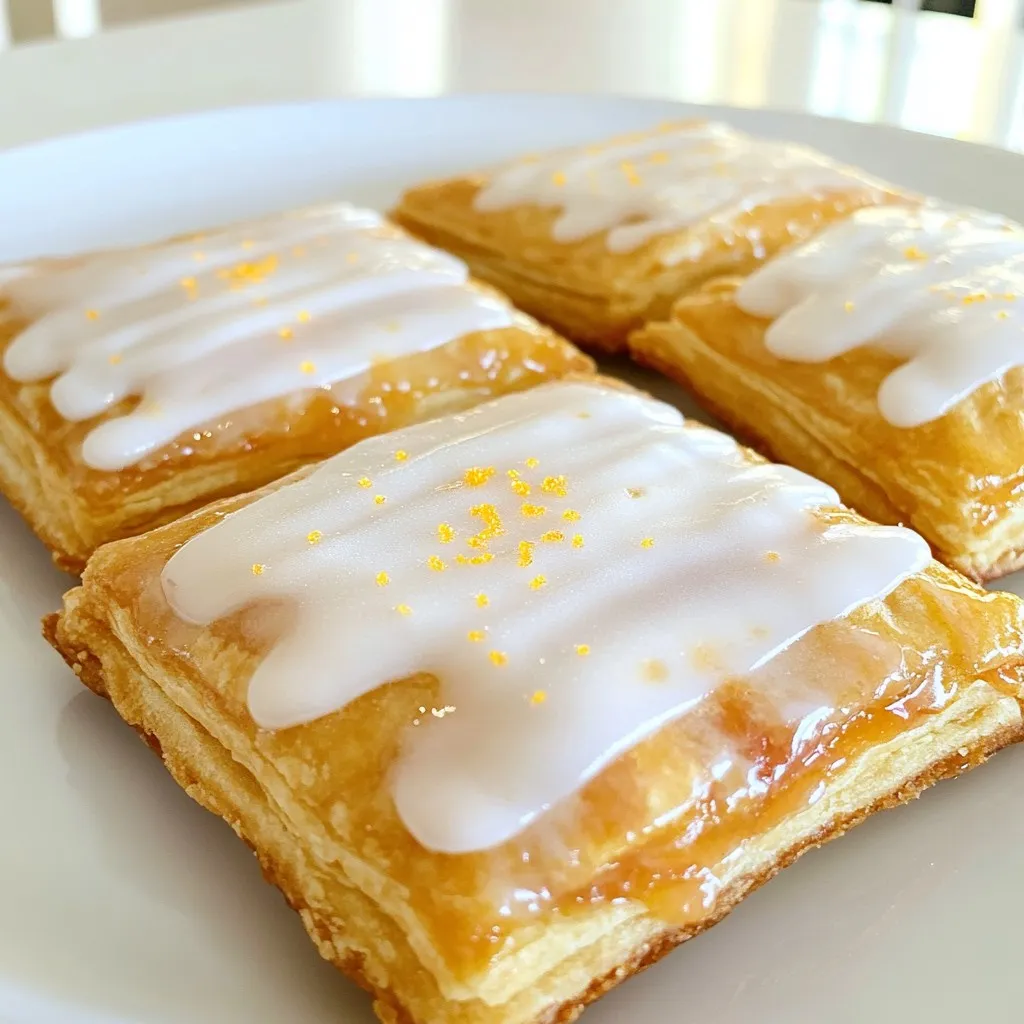
Craving something sweet and fun? You’re in the right spot! Today, I’ll show you how to make the easiest homemade pop tarts that taste even better than the store-bought kind. With just a few simple ingredients and easy steps, you’ll have a delightful treat perfect for any time of day. Get your aprons ready, and let’s dive into this fun, delicious adventure!
Why I Love This Recipe
- Quick and Easy: This recipe is incredibly simple, allowing you to whip up delicious pop tarts in no time!
- Customizable Flavors: You can choose your favorite fruit preserves, making each batch uniquely yours!
- Fun for Everyone: Making pop tarts is a fun activity for kids and adults alike, perfect for family bonding!
- Perfect for Any Occasion: These homemade pop tarts are a delightful treat for breakfast, snacks, or dessert!
Ingredients
Main Ingredients List
– 1 package (1 lb) refrigerated pie crusts
– 1/2 cup of your favorite fruit preserves or jam
– 1 egg for egg wash
– 1 cup powdered sugar
– 2 tablespoons milk or cream
– 1/2 teaspoon vanilla extract
– Optional: Sprinkles or colored sugar for decoration
Gather these simple ingredients to make your homemade pop tarts. You can find refrigerated pie crusts at any grocery store. They save time and keep things easy. Choose your favorite fruit preserves or jam. Strawberry, blueberry, or mixed berry work great. The egg acts as glue to seal the pop tarts.
For the icing, you will need powdered sugar, milk or cream, and vanilla extract. This mix gives your pop tarts a sweet finish. Finally, consider adding sprinkles or colored sugar for fun. This makes your treat even more exciting!
When you have everything ready, you can start making your delightful pop tarts. The process is simple and fun!

Step-by-Step Instructions
Preparation Steps
– Preheat your oven to 375°F (190°C). Line a baking sheet with parchment paper.
– On a floured surface, roll out the pie crusts to about 1/8 inch thick.
– Cut the dough into 3×4 inch rectangles. You need 8 rectangles: 4 for the bottoms and 4 for the tops.
– Take 4 rectangles and place 1 tablespoon of fruit preserves in the center of each. Leave a small border around the edges.
Sealing and Baking
– Brush the edges of the filled rectangles with the beaten egg. This will help seal them.
– Place the remaining rectangles on top of the filled ones. Press down gently on the edges.
– Use a fork to crimp the edges together for a secure seal.
– Poke 2-3 small holes in the tops to let steam escape.
– Brush the tops with the remaining beaten egg for a golden finish.
– Bake the pop tarts in the oven for 20-25 minutes. They should be lightly golden brown and flaky.
Icing Preparation
– While the pop tarts bake, mix powdered sugar, milk, and vanilla in a bowl.
– Whisk until smooth and glossy. If too thick, add more milk, one teaspoon at a time.
– Once the pop tarts cool, drizzle the icing over the tops.
– Add colorful sprinkles if you like. Allow the icing to set before serving.
Enjoy your delightful homemade pop tarts warm or at room temperature!
Tips & Tricks
Achieving Perfect Pop Tarts
To seal the edges well, use the beaten egg as glue. Brush it around the edges before placing the top crust. Press firmly to make sure the filling stays in. A fork works great for crimping the edges. This adds a nice touch and keeps everything sealed tight.
When adding fruit preserves, use about one tablespoon per pop tart. Choose your favorite flavor, like strawberry or blueberry. Make sure to leave space around the edges. This helps with sealing and keeps the filling from oozing out.
Baking Tips
You’ll know your pop tarts are done when they turn golden brown. Check for a flaky texture on the top. If they look pale, give them a few more minutes.
Common mistakes include overfilling or not poking holes. Overfilling causes the filling to burst out. Poking holes lets steam escape and prevents sogginess. Always remember to poke 2-3 holes in the top before baking.
Icing Tips
To get the perfect icing consistency, mix powdered sugar with milk. Start with two tablespoons of milk. If it’s too thick, add a tiny bit more. The icing should flow but not be runny.
For icing decoration, get creative! Use colorful sprinkles or a drizzle of chocolate. You can even add food coloring to the icing for fun designs.
Pro Tips
- Choose Quality Preserves: Use high-quality fruit preserves or jam for the best flavor. Homemade or gourmet brands can elevate your pop tarts significantly.
- Don’t Skip the Egg Wash: Brushing the tops with egg wash not only gives your pop tarts a beautiful golden color but also helps the icing adhere better.
- Experiment with Fillings: Feel free to try different combinations of jams or even add chocolate or nut butter for a unique twist on traditional pop tarts.
- Cool Before Drizzling: Allow your pop tarts to cool slightly before adding icing. This prevents the icing from melting and ensures a nice finish.
Variations
Flavor Options
You can mix things up with your pop tarts. Here are some ideas:
– Fruit Preserves: Try different flavors like raspberry, peach, or apricot. Each jam gives a new taste.
– Chocolate Fillings: Instead of fruit, use Nutella or chocolate spread. This adds a sweet twist.
Dietary Considerations
If you have special diets, you can still enjoy these pop tarts:
– Gluten-Free: Use gluten-free pie crusts. Many brands offer good options that taste great.
– Vegan Adaptation: Replace the egg wash with almond milk. For the icing, use plant-based milk and powdered sugar.
Decorative Ideas
Make your pop tarts fun and festive:
– Holiday Sprinkles: Use colored sprinkles for different holidays. They add a bright touch.
– Custom Icing Designs: Get creative! Use a piping bag to create fun shapes on top. You can even write messages.
These variations let you enjoy pop tarts your way.
Storage Info
Best Practices for Storing Pop Tarts
To keep your homemade pop tarts fresh, follow these tips:
– Short-term storage: Place them in an airtight container. They stay fresh at room temperature for up to three days.
– Long-term freezing: Wrap each pop tart in plastic wrap. Then, store them in a freezer-safe bag. They can last up to three months in the freezer.
Reheating Instructions
When you’re ready to enjoy your pop tarts again, use these methods:
– Oven: Preheat your oven to 350°F (175°C). Place the pop tarts on a baking sheet and heat for about 10 minutes.
– Microwave: Heat them on a plate for about 10-15 seconds. This method is quick but may make them a bit soft.
Shelf Life
Homemade pop tarts last about three days at room temperature. If you freeze them, they can last up to three months. Enjoy them warm or at room temperature for the best taste.
FAQs
Can I use homemade pie crust instead of refrigerated?
Yes, you can use homemade pie crust! Just make sure it’s rolled out thinly, about 1/8 inch thick. The crust needs to be firm enough to hold the filling. Homemade crust adds a personal touch and can taste even better.
How do I know when the pop tarts are fully baked?
Your pop tarts are done when they turn golden brown. Look for a flaky texture on top. It usually takes about 20-25 minutes at 375°F. If the edges start to brown faster, check them often.
Can I make the filling ahead of time?
Absolutely! You can prepare your fruit filling a day ahead. Just store it in the fridge. Make sure to let it come to room temperature before using it in your pop tarts. This helps with even baking.
How do I make pop tarts without using jam?
You can use other fillings like Nutella, peanut butter, or cream cheese. Just ensure the filling isn’t too runny. You can even use fresh fruits mixed with a little sugar. This gives you a fresh taste.
Are pop tarts better fresh or can I store them?
Pop tarts taste best fresh from the oven. However, you can store them. Keep them in an airtight container at room temperature for up to three days. For longer storage, freeze them for up to a month. Just reheat before eating!
Making homemade pop tarts is simple and fun. You learned about the key ingredients and step-by-step instructions. I shared tips for great results and ways to personalize your pop tarts. Don’t forget the icing ideas to make them shine. With options for different flavors and dietary needs, there’s something for everyone. You can store these treats well, and enjoy them later. Experiment with your fillings and decorations. You’ll impress friends and family with your tasty creations. Get baking and enjoy your delicious pop tart