Ready to make a treat that’s both sweet and crunchy? This Rocky Road Chocolate Fudge recipe is easy and fun! You only need a few simple ingredients to whip up a batch that everyone will love. Follow my step-by-step guide, and impress your friends with this mouthwatering dessert. Let’s dive into the world of rich chocolate and delightful toppings that will make your taste buds sing!
Why I Love This Recipe
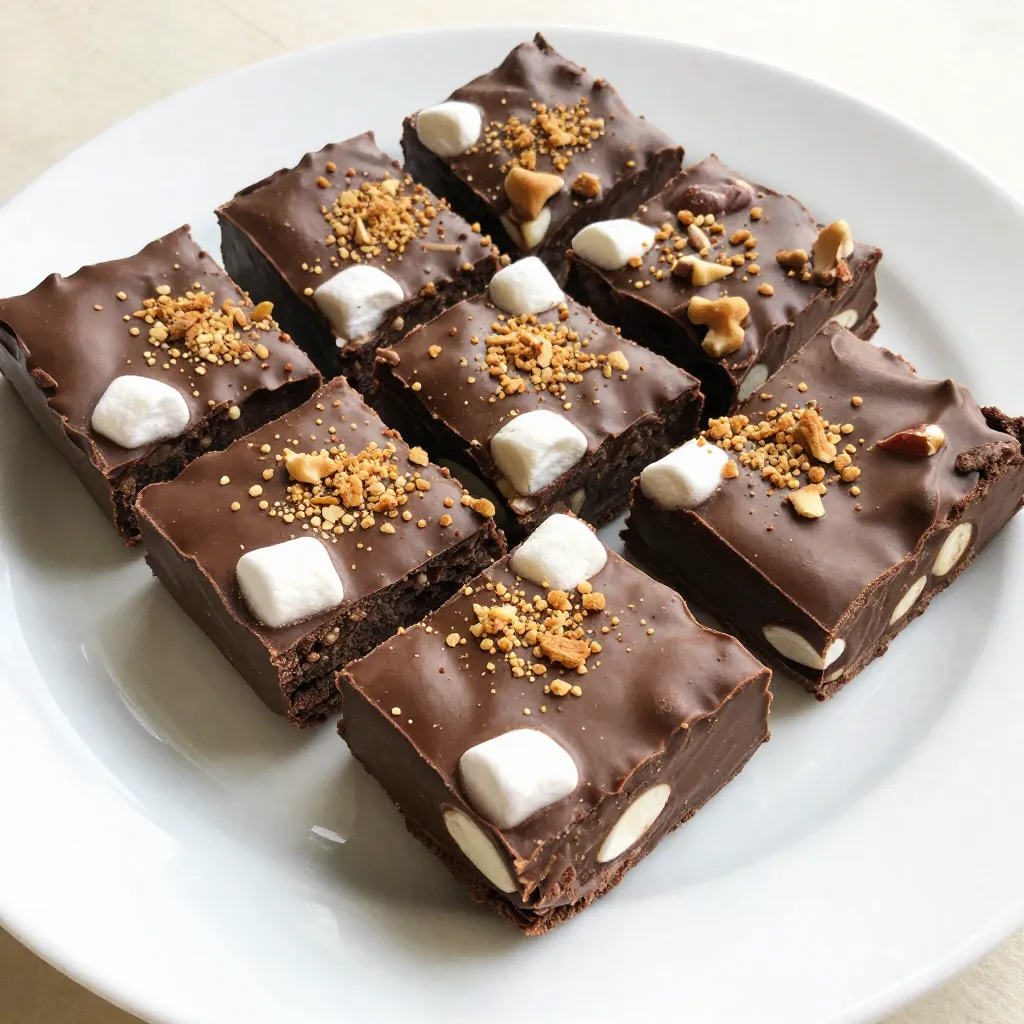
- Indulgent Flavor: This fudge combines rich chocolate, sweet marshmallows, and crunchy nuts for a delightful treat that satisfies any sweet tooth.
- Easy to Make: With just a few simple ingredients and minimal cooking time, this recipe is perfect for both novice and experienced bakers.
- Customizable: You can easily modify this recipe by swapping out nuts or adding different toppings to suit your personal taste.
- Perfect for Sharing: Cut into squares, this fudge is an ideal dessert for parties, gatherings, or as a thoughtful homemade gift.
Ingredients
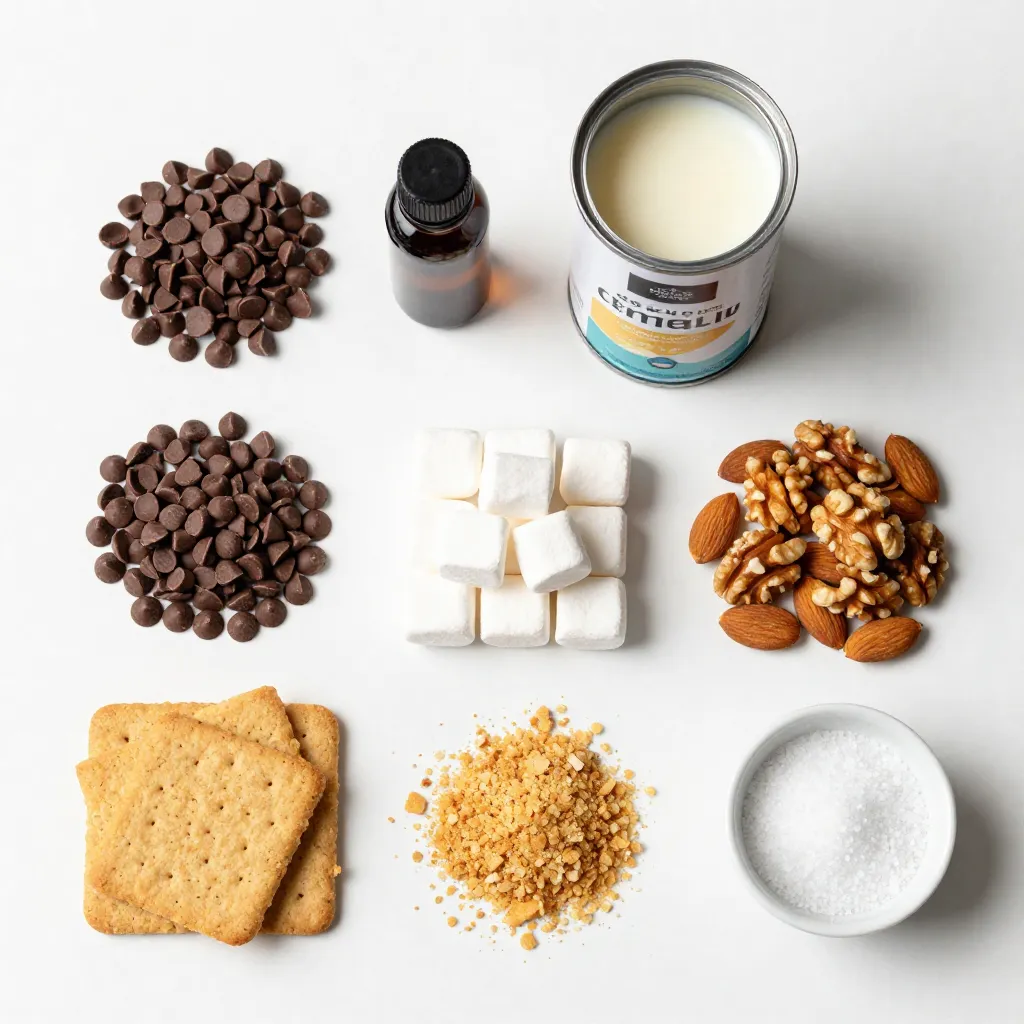
To make Rocky Road Chocolate Fudge, you need these simple ingredients:
– 2 cups semi-sweet chocolate chips
– 1 can (14 oz) sweetened condensed milk
– 1 teaspoon pure vanilla extract
– 1 cup mini marshmallows
– 1 cup chopped nuts (walnuts or almonds)
– 1/2 cup crushed graham crackers
– A pinch of salt
Each ingredient plays an important role in creating that delightful taste. The semi-sweet chocolate chips give a rich flavor. Sweetened condensed milk adds creaminess and sweetness. Vanilla extract enhances the overall taste with its warm notes. Mini marshmallows bring that classic Rocky Road texture. Chopped nuts add crunch, while crushed graham crackers give a nice base and additional flavor. The pinch of salt balances all the sweetness.
Remember, using high-quality ingredients makes a big difference. Always choose the best chocolate you can find. This will elevate your fudge to a whole new level.
Step-by-Step Instructions
Preparation of Baking Pan
Start with an 8×8 inch baking pan. Take a piece of parchment paper. Cut it larger than the pan. Place the paper in the pan, letting it hang over the edges. This helps lift the fudge out easily when it’s set. Smooth out any wrinkles for a clean look.
Melting the Chocolate Mixture
In a medium saucepan, add 2 cups of semi-sweet chocolate chips, 1 can of sweetened condensed milk, and a pinch of salt. Set the pan over low heat. Stir this mixture gently and constantly. This keeps the chocolate from burning and helps it melt evenly. You want a smooth and creamy blend.
Incorporating Additional Ingredients
Once your chocolate is melted, remove the pan from the heat. Stir in 1 teaspoon of pure vanilla extract for flavor. Then, fold in 1 cup of mini marshmallows, 1 cup of chopped nuts, and 1/2 cup of crushed graham crackers. Make sure these ingredients mix well with the chocolate. This gives your fudge that classic Rocky Road texture. Pour the mixture into your lined pan and spread it out evenly.
Tips & Tricks
Common Mistakes to Avoid
To prevent burning chocolate, use low heat. If it gets too hot, the chocolate can seize or burn. Stir constantly while melting. This keeps the chocolate smooth and creamy. If you see any lumps, remove the heat and keep stirring until melted. Always use a heavy-bottomed pan. It helps spread the heat evenly.
Achieving the Perfect Fudge Texture
To test fudge consistency, scoop a small amount and let it cool. If it firms up but is still soft, you are good to go. If it’s too runny, it needs more time in the fridge. Remember, it will harden as it cools. Check after two hours for the right texture.
Presentation Tips
For a fun presentation, arrange the fudge on a colorful plate or in a box. You can also stack the pieces in layers for height. Add extra mini marshmallows or nuts on top for a pop of color. These touches make your fudge look as tasty as it is!
Pro Tips
- Use High-Quality Chocolate: The flavor of your fudge is heavily influenced by the type of chocolate you use. Opt for high-quality semi-sweet chocolate chips for the best taste.
- Don’t Overheat the Mixture: When melting the chocolate, keep the heat low and stir continuously to prevent burning. This ensures a smooth and creamy fudge.
- Customize Your Add-Ins: Feel free to experiment with different nuts, like pecans or macadamias, and even add dried fruits for a unique twist on the traditional Rocky Road.
- Store Properly: To keep your fudge fresh, store it in an airtight container at room temperature for up to a week, or in the refrigerator for longer shelf life.
Variations
Alternative Ingredients
You can switch up the nuts in your fudge. Try using pecans or hazelnuts. Each nut brings its own taste and crunch. Walnuts give a rich flavor, while almonds add a nice snap. If you want a fruity twist, add dried cherries or cranberries. These changes can make your Rocky Road unique!
Flavor Enhancements
Want to boost the taste? Consider adding peanut butter or caramel. Stir in a half cup of creamy peanut butter for a nutty kick. Or drizzle some caramel on top before it sets. This adds a sweet surprise to each bite. You can even mix in some espresso powder. It enhances the chocolate flavor and gives a deeper taste.
Dietary Modifications
If you’re looking for gluten-free options, use gluten-free graham crackers. You can also make this fudge vegan. Replace the chocolate chips with dairy-free ones. Use coconut milk instead of sweetened condensed milk. These swaps will keep the fudge tasty and fun for everyone.
Storage Info
Best Practices for Storing Fudge
Store your Rocky Road Chocolate Fudge in an airtight container. This keeps it fresh and tasty. Use parchment paper between layers to stop them from sticking. Keep the container in a cool, dry place. Avoid areas with heat or light, as they can change the fudge’s texture.
Shelf Life
Rocky Road Chocolate Fudge lasts about one to two weeks at room temperature. If you keep it in the fridge, it can last up to three weeks. Always check for any signs of spoilage, like off smells or changes in texture. If it looks good, it’s probably still safe to eat.
Freezing Fudge
To freeze your fudge, follow these steps:
1. Cut the fudge into small squares or rectangles. Smaller pieces freeze better.
2. Wrap each piece in plastic wrap. This prevents freezer burn and keeps the flavor intact.
3. Place the wrapped pieces in a freezer-safe bag or container. Make sure to label it with the date.
4. To thaw, remove the fudge from the freezer. Let it sit at room temperature for about 30 minutes before eating. This helps regain its soft, chewy texture.
Now, you can enjoy your fudge anytime!
FAQs
Can I use milk chocolate instead of semi-sweet?
Yes, you can use milk chocolate. It makes the fudge sweeter and creamier. The texture may change. Milk chocolate melts smoothly, but it won’t have the same rich taste. If you want a strong chocolate flavor, stay with semi-sweet.
What can I use instead of sweetened condensed milk?
For a dairy-free option, use coconut cream or cashew cream. You can also mix almond milk with sugar for a similar effect. Other choices include oat milk or soy milk with sugar. These alternatives keep the fudge tasty while fitting different diets.
How do I know when the fudge is set?
Check the fudge after about two to three hours in the fridge. It should feel firm but not hard. Press your finger gently on top. If it holds the shape, it is ready. If it feels soft, give it more time to chill.
This guide took you through making delicious Rocky Road Chocolate Fudge. We covered ingredients, preparation, and important tips. You learned about variations to suit different tastes and dietary needs.
Now, with proper storage, your fudge can stay fresh and tasty. Enjoy your fudge-making journey! Experiment and share it with friends. Each bite can bring joy and satisfactio