If you’re looking for a simple and delightful treat, peppermint creams are perfect for you! These sweet bites combine rich flavors and a smooth texture, making them a hit for all ages. I’ll share everything you need to know about making peppermint creams, from the finest ingredients to easy steps. Whether you’re a baking pro or a newbie, you can make these delightful candies at home. Let’s dive into the fun!
Why I Love This Recipe
- Easy to Make: This recipe only requires a few simple ingredients and can be whipped up in no time, making it perfect for both novice and experienced bakers.
- Festive Flavor: The combination of peppermint and chocolate creates a delightful holiday flavor that’s perfect for any celebration or treat.
- Customizable: You can easily adjust the sweetness or add more peppermint extract to suit your taste, making this recipe versatile for everyone.
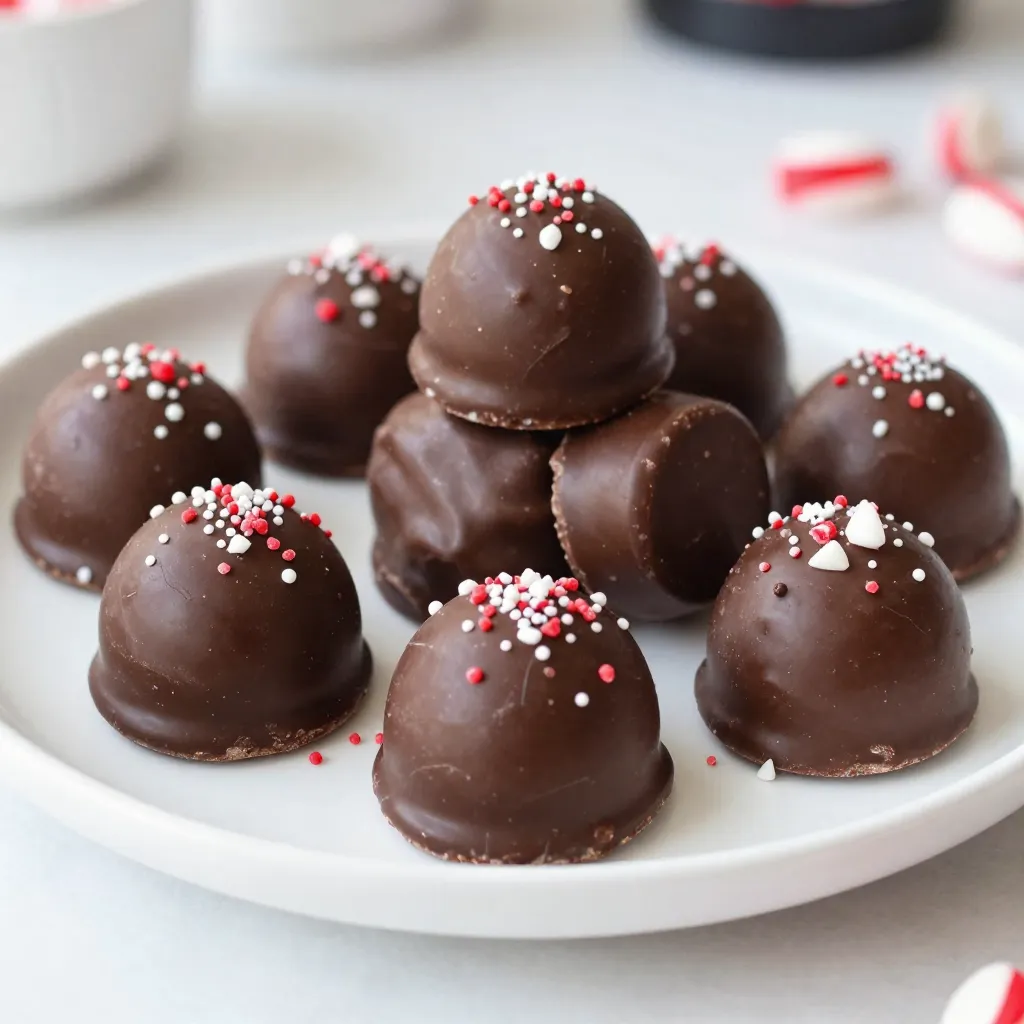
- Impressive Presentation: These candies look stunning on any platter, especially with the added touch of crushed peppermint for garnish.
Ingredients
List of Required Ingredients
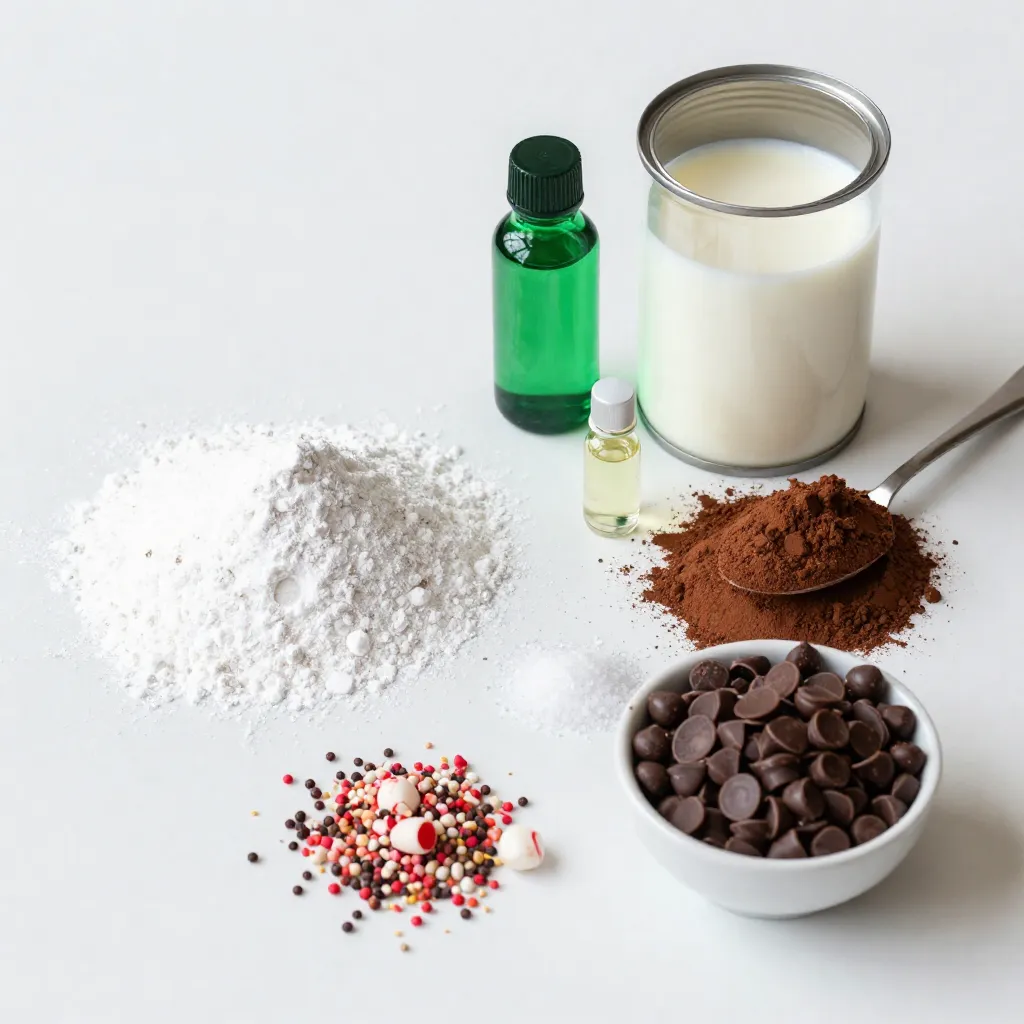
To make peppermint creams, gather these key ingredients:
– 2 cups powdered sugar
– 1 cup sweetened condensed milk
– 1/2 cup unsweetened cocoa powder
– 1 teaspoon peppermint extract
– 1/2 teaspoon vanilla extract
– A pinch of salt
– 1 cup dark chocolate chips (for coating)
– Crushed peppermint candies (for garnish)
These ingredients create a rich and creamy treat that melts in your mouth.
Optional Ingredients for Variations
You can add some fun twists to your peppermint creams! Consider these optional ingredients:
– White chocolate chips for a sweeter coating
– A few drops of food coloring for a festive look
– Different extracts like almond or orange for unique flavors
These variations can change the taste and appearance of your candies.
Tips for Choosing Quality Ingredients
Quality matters when making peppermint creams. Here are some tips to select the best ingredients:
– Powdered sugar: Choose a finely ground sugar to help blend smoothly.
– Condensed milk: Use a brand with no additives for pure flavor.
– Cocoa powder: Opt for unsweetened cocoa to get a rich chocolate taste.
– Chocolate chips: Pick high-quality dark chocolate for a better coating.
Selecting the right ingredients makes a big difference in taste and texture.
Step-by-Step Instructions
Mixing the Dough
To start, gather all your ingredients. You need powdered sugar, sweetened condensed milk, cocoa powder, peppermint extract, vanilla extract, and a pinch of salt. In a big mixing bowl, add these ingredients. Use a spatula or wooden spoon to mix them well. Stir until the mixture becomes thick and smooth. The dough should hold together nicely but not feel sticky.
Shaping the Candies
Once your dough is ready, it’s time to shape the candies. Take small spoonfuls of the dough. You can either roll them into small balls or flatten them into discs about half an inch thick. Try to make them even in size. This helps them look great and cook evenly.
Preparing the Chocolate Coating
While your candies chill, prepare the chocolate coating. In a microwave-safe bowl, add the dark chocolate chips. Heat them in the microwave for 30 seconds at a time. Stir after each interval until the chocolate is smooth and fully melted. Be careful not to overheat it; this can ruin the chocolate.
Dipping and Garnishing
After the candies have chilled, it’s time to dip them in chocolate. Use a fork or a dipping tool to carefully dip each piece into the melted chocolate. Make sure each one is fully coated. Let any excess chocolate drip off before placing them back on the parchment-lined baking sheet. While the chocolate is still soft, sprinkle crushed peppermint candies on top. This adds a nice crunch and a festive touch. Finally, return them to the fridge for another 15 minutes or until the chocolate hardens completely.
Tips & Tricks
Achieving the Perfect Consistency
To get the best texture for your peppermint creams, mix the dough well. Start with powdered sugar and sweetened condensed milk. Stir until it feels thick and smooth. It should hold together and not stick to your hands. If it is too sticky, add a little more powdered sugar. If too dry, add a drop more condensed milk. Aim for a dough that feels like playdough. This will help you shape it easily.
Decorating Ideas for Serving
Presentation matters! Place your finished peppermint creams on a nice platter. You can add crushed peppermint candies on top for a pop of color. Fresh mint leaves also make a beautiful touch. For a festive look, use a mix of red and white plates. This adds to the holiday spirit. You can even wrap them in clear bags tied with ribbons as gifts. Everyone loves a sweet treat they can enjoy at home or share!
Common Mistakes to Avoid
Avoiding simple mistakes can make a big difference. First, do not rush the chilling time. Let the candies firm up for at least 30 minutes. This helps them hold their shape when dipped in chocolate. Second, be careful not to overheat the chocolate. Heat it in short bursts to keep it smooth. Lastly, don’t skip the crushed peppermint on top. It adds a nice crunch and makes them extra special. Following these tips will ensure your peppermint creams are a hit!
Pro Tips
- Chill the Dough: Make sure to chill the dough for at least 30 minutes. This helps the peppermint creams hold their shape and makes them easier to dip in chocolate.
- Perfectly Melted Chocolate: When melting chocolate, use a microwave-safe bowl and heat in short intervals. Stir between each increment to prevent the chocolate from seizing or burning.
- Customize Your Coating: Try using white chocolate or milk chocolate instead of dark chocolate for a different flavor profile. You can also experiment with different types of toppings!
- Storage Tips: Keep your peppermint creams in an airtight container in the refrigerator to maintain their freshness. They can last up to two weeks!
Variations
Alternative Flavorings
You can change the flavor of your peppermint creams easily. Try using almond or orange extract instead of peppermint. You can even mix in a bit of espresso powder for a coffee twist. Each flavor brings a new taste to this treat.
Different Coating Options
While dark chocolate is classic, feel free to experiment. White chocolate adds sweetness, while milk chocolate offers a creamy taste. For a fun twist, try coating the creams in crushed nuts or shredded coconut. This adds texture and makes each piece unique.
Dietary Adaptations (e.g., vegan, sugar-free)
You can make these peppermint creams fit your dietary needs. For a vegan version, swap out the sweetened condensed milk for coconut cream. Use dairy-free chocolate chips as your coating. If you want sugar-free treats, use powdered erythritol or another sugar substitute. These options allow everyone to enjoy peppermint creams!
Storage Info
Best Practices for Storing Candies
To keep your peppermint creams fresh, store them in an airtight container. Layer them with parchment paper to prevent sticking. Place the container in a cool, dry area. Avoid exposing the candies to heat or moisture, as this can change their texture and flavor.
Shelf Life of Homemade Peppermint Creams
Homemade peppermint creams last about two weeks at room temperature. If you store them in the fridge, they can last up to four weeks. The cool environment helps keep them firm and tasty. Always check for any signs of spoilage before serving.
Tips for Freezing and Thawing
You can freeze peppermint creams for longer storage. First, freeze them on a baking sheet for about an hour. Once firm, transfer them to a freezer bag or airtight container. When you’re ready to enjoy them, thaw in the fridge overnight. This method keeps their texture smooth and taste fresh.
FAQs
Can I make Peppermint Creams ahead of time?
Yes, you can make peppermint creams ahead of time. These tasty treats store well in the fridge for up to two weeks. Just prepare them, coat them in chocolate, and let them set. Once done, keep them in an airtight container. This way, you can enjoy them fresh when you want a sweet bite. You can also make them a month early and freeze them. Just thaw in the fridge before serving for the best taste.
How can I adjust the sweetness of the recipe?
To adjust the sweetness, you can change the amount of powdered sugar. If you like it less sweet, use one and a half cups instead of two. You can also add a little unsweetened cocoa powder to balance the sweetness. If you want it sweeter, add more powdered sugar a little at a time. Taste as you go, and stop when it reaches your perfect sweetness level.
Where can I buy ready-made Peppermint Creams?
You can find ready-made peppermint creams in many stores. Check local candy shops or specialty food stores. Some larger supermarkets may also carry them in the candy aisle. If you prefer buying online, many gourmet candy websites sell them. Just search for peppermint creams, and you’ll find several options to choose from.
This blog post covered the key ingredients and step-by-step guide to making peppermint creams. I shared tips for choosing quality ingredients and avoiding common mistakes. You can create fun variations for different tastes and diets. Storing your candies correctly ensures they last longer. With these tips, you’ll make delicious homemade candies to share and enjoy. Explore your creativity, and have fun making these sweet