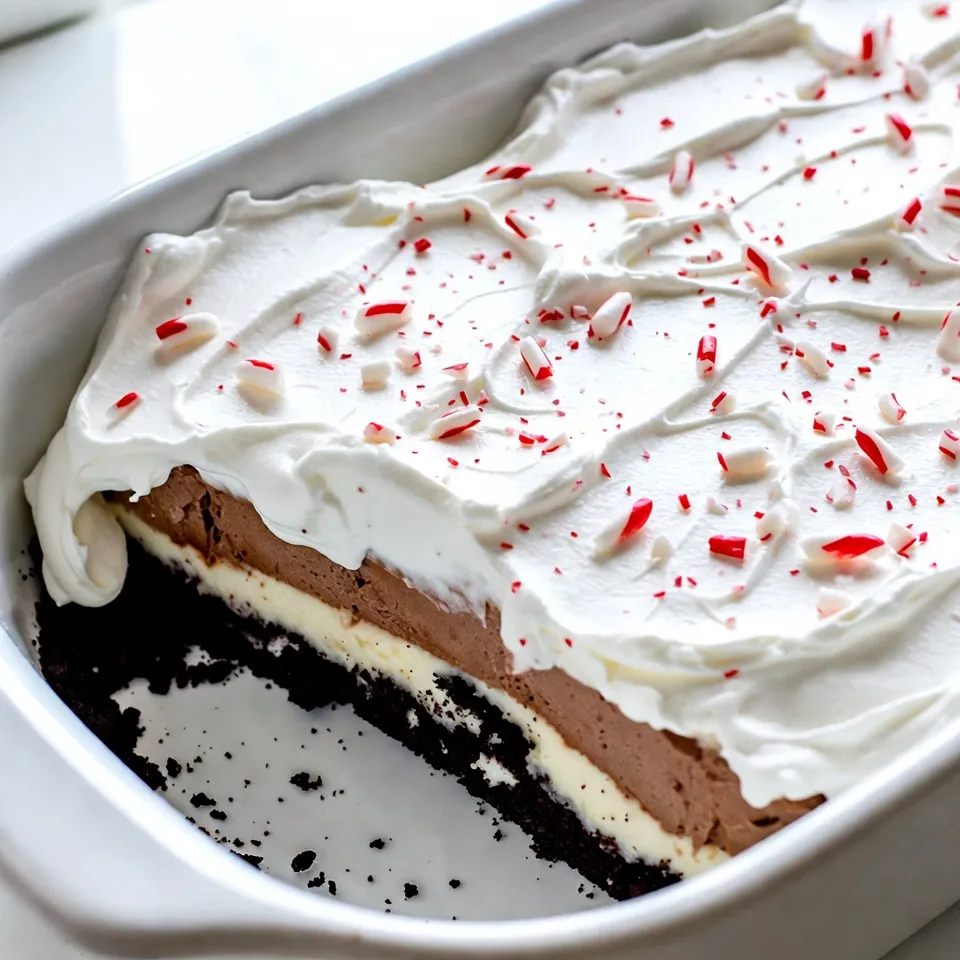
If you want a festive dessert that’s easy and tastes amazing, try my No-Bake Christmas Oreo Lasagna! This layered treat combines creamy goodness with crunchy Oreos for a perfect holiday delight. You’ll love how quickly it comes together. Plus, it’s a hit at any party! Follow my steps for a dessert that impresses everyone without turning on the oven. Let’s dive into this simple and delicious recipe!
Why I Love This Recipe
- Effortless Preparation: This no-bake dessert is incredibly easy to assemble, making it perfect for busy holiday gatherings.
- Layered Delight: The combination of creamy layers and crunchy Oreo crust creates a delightful texture that everyone loves.
- Festive Flavor: The addition of crushed peppermint candies adds a refreshing holiday twist that enhances the overall flavor.
- Impressive Presentation: This dessert looks stunning when served, making it a showstopper at any festive occasion.
Ingredients
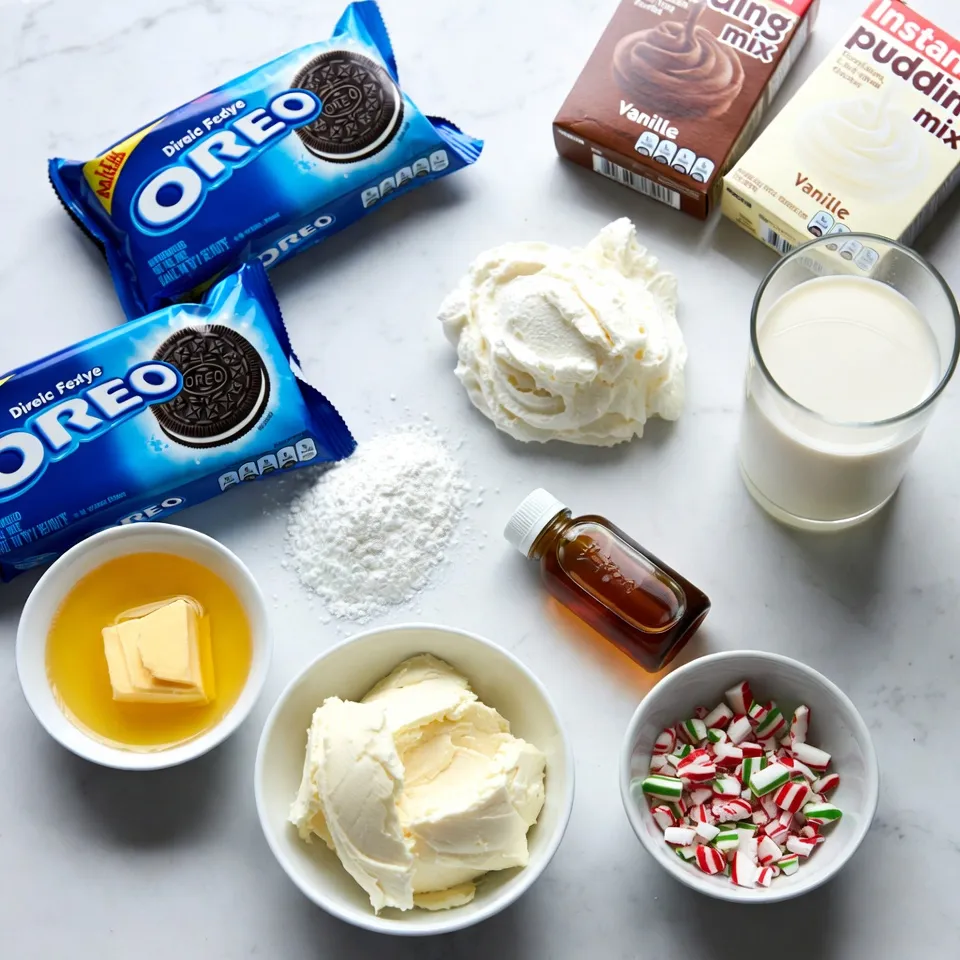
To make your No-Bake Christmas Oreo Lasagna, gather these ingredients:
– 2 packs of Oreo cookies (about 36 cookies)
– 1/2 cup unsalted butter, melted
– 2 cups cream cheese, softened
– 1 cup powdered sugar
– 2 cups Cool Whip (whipped topping)
– 1 teaspoon vanilla extract
– 1 cup milk
– 1 box (3.9 oz) instant chocolate pudding mix
– 1 box (3.9 oz) instant vanilla pudding mix
– 1/2 cup crushed peppermint candies (for garnish)
Each ingredient plays a key role in this dessert. The Oreo cookies form the base, giving a rich chocolate flavor. The melted butter helps bind the cookie crumbs together. Cream cheese adds a creamy layer, while powdered sugar sweetens it up. Cool Whip creates a light and fluffy texture.
The vanilla extract enhances the flavor, and milk helps prepare the pudding mixes. The chocolate and vanilla puddings add layers of taste and contrast. Finally, crushed peppermint candies give a festive touch on top.
By using high-quality ingredients, you will ensure the best flavor. Always taste as you go! Enjoy the process of making this delightful dessert.
Step-by-Step Instructions
Preparing the Oreo Crust
To start, you need two packs of Oreo cookies. Place them in a food processor. Pulse the cookies until you get fine crumbs. Next, melt half a cup of unsalted butter. In a bowl, mix the cookie crumbs with the melted butter. It should feel like wet sand. Press this mixture into a 9×13 inch baking dish. Make sure the crust is even and firm.
Making the Cream Cheese Layer
Now, grab two cups of softened cream cheese. Place it in a large bowl. Add one cup of powdered sugar to the cream cheese. Use an electric mixer to blend until smooth. Gently fold in one cup of Cool Whip. Make sure there are no lumps. Spread this cream cheese mix over your Oreo crust.
Preparing the Pudding Layers
For the pudding layers, you need chocolate and vanilla pudding mixes. In two bowls, prepare each pudding as the package says. Use two cups of milk for each flavor. Stir until combined. Let it sit for a few minutes to thicken. Once ready, pour the chocolate pudding over the cream cheese layer. Then, add the vanilla pudding on top.
Adding the Final Topping
Take the remaining Cool Whip and spread it over the pudding layers. Use a spatula to make it smooth and even. This will create a nice finish for your dessert.
Chilling the Dessert
Now, cover the baking dish with plastic wrap. Place it in the fridge. Let it chill for at least four hours. This helps the layers set well.
Garnishing and Serving
Before serving, sprinkle crushed peppermint candies on top. This adds a festive touch. Cut the dessert into squares and serve it to your guests. Enjoy the smiles!
Tips & Tricks
Achieving the Perfect Oreo Crust
To make a great Oreo crust, start with good quality Oreos. Use a food processor to crush them into fine crumbs. Mix these crumbs with melted butter. It should feel like wet sand. Press this mix firmly into the bottom of your baking dish. Make sure it is even. This helps the crust hold together well.
Best Practices for Cream Cheese Layer
For the cream cheese layer, use softened cream cheese. This makes it easy to mix. Combine it with powdered sugar in a bowl. Beat it until smooth and creamy. Then, fold in Cool Whip gently. This keeps the mix light and fluffy. Spread this layer evenly over the crust. It adds a rich taste to your dessert.
Pudding Layer Consistency Tips
When making the pudding layers, follow the package directions. Use cold milk for both chocolate and vanilla puddings. Stir until mixed and let them sit. This helps them thicken. Carefully pour the chocolate pudding over the cream cheese layer. Then, add the vanilla pudding on top. This creates a lovely, layered look.
Garnishing Suggestions
To add a festive touch, sprinkle crushed peppermint candies on top. This gives a great crunch and flavor. You can also use extra Cool Whip for a nice finish. For a special touch, serve each piece on holiday plates. Add a sprig of mint or a mini candy cane beside each slice. This makes your dessert look even more inviting.
Pro Tips
- Use Fresh Ingredients: Always use fresh cream cheese and Cool Whip for the best texture and flavor in your lasagna.
- Chill Time is Key: Allow the lasagna to chill for a full 4 hours or overnight for the layers to set perfectly.
- Customizable Flavors: Experiment with different flavors of pudding or add layers of fruit for a unique twist on this classic dessert.
- Presentation Matters: Use a sharp knife for clean cuts and serve on festive plates to elevate your dessert’s appearance.
Variations
Different Cookie Options
You can change the cookies in this Oreo lasagna. Try using mint Oreos for a fresh twist. Golden Oreos can give a lighter flavor. You could even use gluten-free Oreos to fit your needs. Each type will change the taste and fun of this dessert.
Alternative Pudding Flavors
While chocolate and vanilla are classic, feel free to mix it up! Try butterscotch pudding for a sweet layer. Strawberry pudding can add a fruity touch. You can even use cookies and cream pudding for extra Oreo flavor. Each option offers a new and exciting taste in every bite.
Vegan or Gluten-Free Adaptations
To make this dessert vegan, swap cream cheese for vegan cream cheese. Use coconut whipped cream instead of Cool Whip. Choose gluten-free Oreos to keep it safe for gluten-free eaters. With these changes, everyone can enjoy this festive treat!
Storage Info
How to Store Leftovers
To keep your No-Bake Christmas Oreo Lasagna fresh, cover it tightly. Use plastic wrap or foil to seal the dish. Place it in the fridge. This dessert lasts for about 3 to 4 days. If you notice any change in texture or smell, it’s best to toss it.
Freezing Options
Freezing this dessert is also possible. First, cut it into squares. Wrap each piece in plastic wrap. Then place them in an airtight container. This way, they won’t get freezer burn. You can freeze the lasagna for up to 2 months. When you’re ready to eat, let it thaw in the fridge overnight.
Reheating Instructions
This dessert is best served cold, so reheating is not needed. If you prefer it slightly soft, let it sit at room temperature for about 10 to 15 minutes. This will help it become creamy again without losing its charm. Enjoy each delightful bite!
FAQs
How long can No-Bake Christmas Oreo Lasagna be stored in the fridge?
You can store No-Bake Christmas Oreo Lasagna in the fridge for up to 5 days. Just make sure it is covered well with plastic wrap. This keeps it fresh and tasty. The layers stay firm and the flavors blend well over time.
Can I use low-fat ingredients?
Yes, you can use low-fat ingredients. Swap regular cream cheese for low-fat cream cheese. Use light Cool Whip too. The taste might change slightly, but it will still be delicious. Just remember, it might not be as rich and creamy, but it will still satisfy your sweet tooth.
Is it possible to prep the layers in advance?
Absolutely! You can prepare the layers a day or two ahead. Just keep each layer stored separately in the fridge. When you’re ready, layer them together and chill. This saves time on busy days and makes serving easier.
What can I substitute for Cool Whip?
If you need a substitute for Cool Whip, use heavy whipping cream. Whip it until stiff peaks form. You can also use homemade whipped cream. Just add a little sugar to sweeten it. Both options will work well and keep your dessert creamy and light.
This blog covered how to make a No-Bake Christmas Oreo Lasagna. We discussed the ingredients, like Oreo cookies and cream cheese. You learned step-by-step instructions for each layer, from the crust to the topping. Tips helped ensure perfect layers and garnishing ideas added flair. We also explored variations and storage options to keep your dessert fresh.
In the end, this simple treat brings joy and is easy to share. Enjoy making it for your friends and family this seaso